On July 24, the SpartaDEX lockdrop starts and will last until TGE, which is scheduled for August 3, 2023. You could already read an article about it on our Medium platform:
https://spartadex.medium.com/the-final-challenge-the-spartadex-lockdrop-7aa655eb9165
We have also prepared a document with answers to the most frequently asked questions:
Now it’s time for the last part — a guide that will walk you through the entire process of participating in our lockdrop. Here we go!
A. PREPARATION PHASE
At the beginning, let’s determine whether you are properly prepared for the lockdrop and whether you already have liquidity provided on one of the supported exchanges: Sushiswap and Camelot. We also provide some instructions for those, who have their liquidity on UniSwap.
— — — —
But first, let’s take a look on the pairs available at the lockdrop, and the number of $SPARTA tokens allocated to them:
- WETH/ARB — 1,500,000 $SPARTA
- USDC.e/USDT — 1,500,000 $SPARTA
- WETH/USDC.e —1,500,000 $SPARTA
- GSWIFT/USDC.e —750,000 $SPARTA (Sushiswap only!)
- WBTC/WETH — 750,000 $SPARTA
Total: 6,000,000 $SPARTA
IMPORTANT NOTE
All USDC pairs are actually USDC.e pairs!
—
50% of rewards is available at TGE (which accounts for 57% of the initial circulating supply), the other 50% is unlocked during 6m vesting period
—
Phase 2 is rewarded with 1,000,000 $SPARTA tokens (100% TGE) which is equivalent to ~20% of initial circulating supply.
— — — — —
To participate in the lockdrop, you need to have some liquidity added in one or more of these pairs on the Sushiswap or Camelot exchanges.
IMPORTANT NOTICE!
We support only V2 liquidity pools. Implementing V3 is part of our roadmap for upcoming months.
If you’ve already done this before, skip ahead to section B. If not, keep reading. The next section is divided into several chapters:
- ADDING LIQUIDITY ON SUSHISWAP
- ADDING LIQUIDITY ON CAMELOT
- LIQUIDITY FROM UNISWAP
- IMPORTANT! SUSHISWAP/CAMELOT — STAKED LP
— — — — —
- ) ADDING LIQUIDITY ON SUSHISWAP
In the Phase 1 window, click the “Provide” button next to the pair of your choice. You will open the window for adding liquidity on Sushiswap:
IMPORTANT!
The “Provide” button will be available only after the lockdrop starts. If you want to prepare and add liquidity earlier, you can do it directly through the Sushiswap/Camelot website

- Click the “Connect wallet” button to connect your wallet to the Sushiswap exchange
- IMPORTANT! Liquidity needs to be added on the Arbitrum One network, check if it is set in the upper right corner.
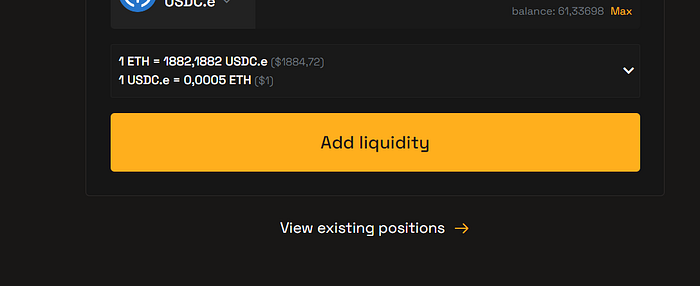
- Set the number of tokens you want to add to the liquidity pool. The number of the second token in the pair will automatically adjust so that both sides of the pool have equal value.
- Press the “Approve (token name)” button to approve the use of the token for the transaction (in this example USDC.e). Confirm the transaction in your wallet (e.g. Metamask).

- The button will change to “Add liquidity”, click it, then press “Add” in the pop-up window and confirm the transaction in the wallet (e.g. Metamask).
- Congratulations! You just added liquidity on Sushiswap. You can now go to section B.
— — — — — —
2.) ADDING LIQUIDITY ON CAMELOT
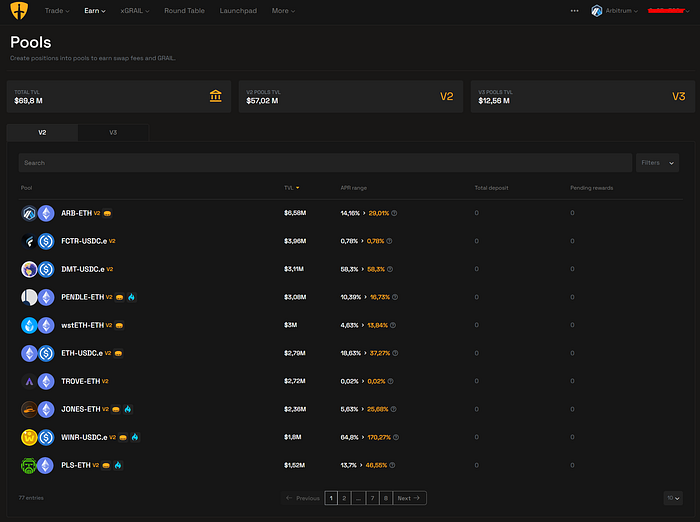
Go to: https://app.camelot.exchange/pools, click on “Connect” to connect your wallet (e.g. Metamask) to the exchange app. Set the network to “Arbitrum”:
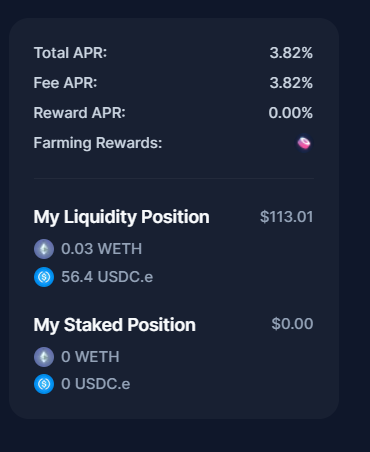
- Find the pair you are interested in on the list and click on it
IMPORTANT! Migrating GSWIFT-USDC.e liquidity from Camelot is not available!

- Click on “Create position”
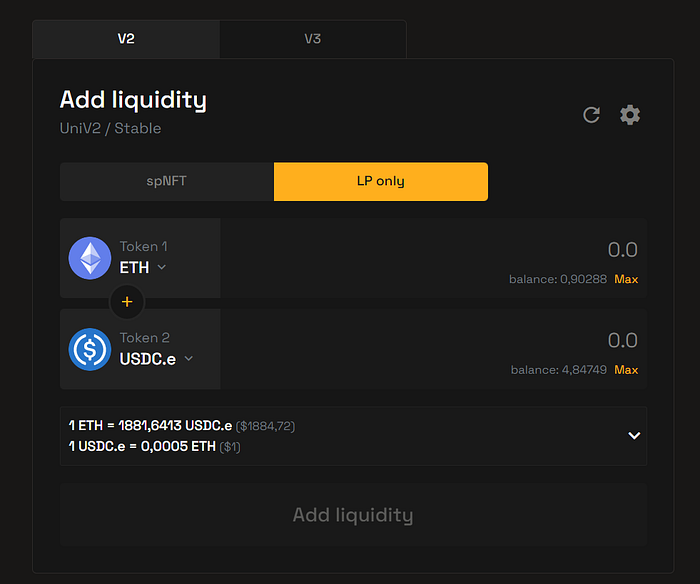
- Make sure you have the “V2” and “LP only” options set in this window.
- Set the number of tokens you want to add to the liquidity pool. The number of the second token in the pair will automatically adjust so that both sides of the pool have equal value.
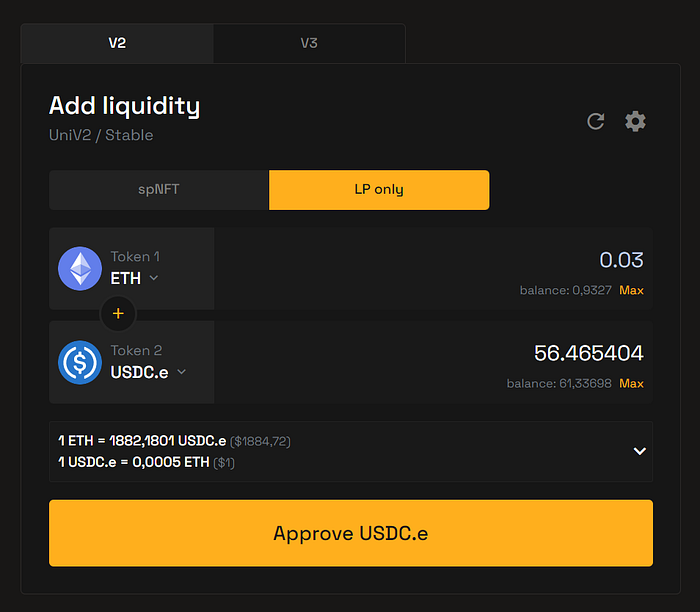
- Press the “Approve (token name)” button to approve the use of the token for the transaction (in this example USDC.e). Confirm the transaction in your wallet (e.g. Metamask).
- The button will change to “Add liquidity”, click it, then press “Add liquidity” again in the pop-up window and confirm the transaction in the wallet (e.g. Metamask).
- Congratulations! You just added liquidity on Camelot. You can now go to section B.
— — — — —
3.) LIQUIDITY FROM UNISWAP
Our lockdrop does not support liquidity migration from Uniswap. If you have added liquidity on this exchange, you need to remove it and add it on one of the above supported exchanges (Sushiswap or Camelot).
— — — — —
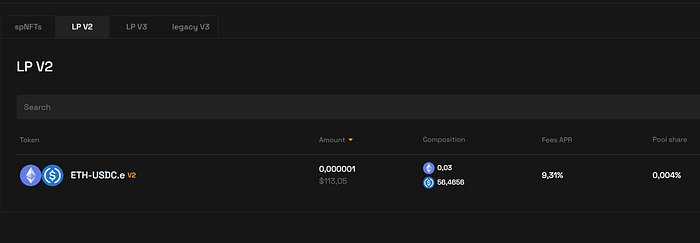
4.) IMPORTANT! SUSHISWAP/CAMELOT — STAKED LP
If you have added liquidity on any of the supported exchanges (Sushiswap/Camelot) and have locked (staked) your LP tokens, you must unstake them before participating in the lockdrop. Otherwise, LP tokens will not be visible in the lockdrop window.
B. PHASE I — LOCKING THE LIQUIDITY OF SELECTED PAIRS (JULY 24 — 30)
Let’s move on to the platform itself. You can find it at:
The upper menu leads to the main page (Launch Plan), individual phases and the FAQ, containing answers to important questions.

“LAUNCH PLAN” is the first one to visit. It’s the main lockdrop page, presenting the timeline and basic information about each phase. Read these information carefully. You can also use shortcut button leading to the current active phase.

Let’s move on to “PHASE 1”.
Here is the user interface for SpartaDEX Lockdrop Phase 1:
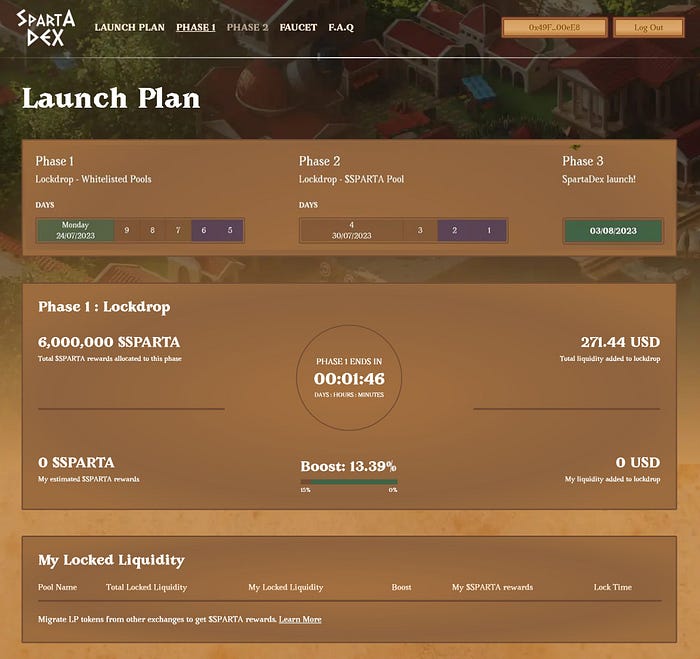
It is divided into several sections:
- lockdrop timeline;
- Phase I summary and status (time remaining, current boost, total liquidity added, your liquidity, rewards);
- your currently locked liquidity broken down by pairs and dexes;
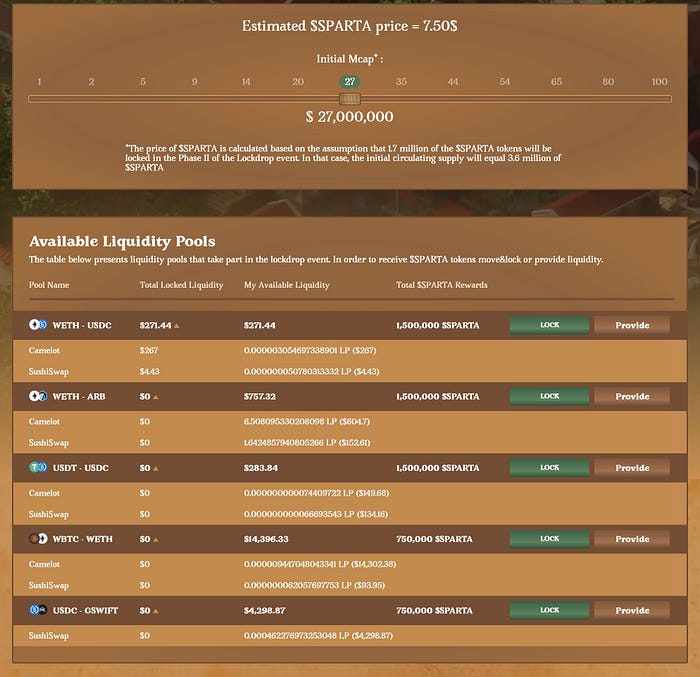
- slider with the predicted price of the $SPARTA token;
- liquidity pools available for lockdrop;
BOOST — IMPORTANT INFORMATION!
To reward early contributors we introduced the “BOOST” which will last through whole Phase 1. It will start at +15% on day one and will linearly decrease to 0% by the end of Phase 1. This means that the earlier you decide to add/migrate liquidity in Phase 1, the bigger the rewards you will get in the $SPARTA token!
The last section is your goal for now. This is where your LP tokens get locked. Find the pool of your choice and click LOCK.
“Provide” button allows you to open the selected exchange window and add liquidity in case you haven’t done it before (go to section A for help)
Here is the locking window:
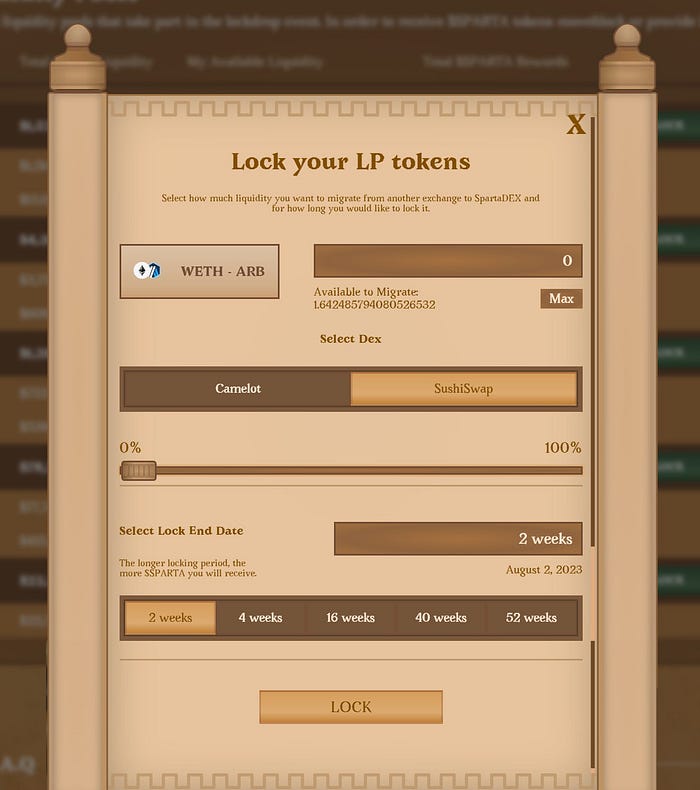
Select the number of LP tokens you want to lock (by typing manually, pressing the “Max” button, or using the slider), select the exchange from which you will transfer the tokens and select the lock period.
In the first phase the locking period can vary from 2 to 52 weeks. The longer the lock is, the higher rewards you will get.
Confirm the actions with the “LOCK” button.
Now a disclaimer containing a number of formal consents will be displayed. The confirmation of them is necessary to continue. READ THEM CAREFULLY!
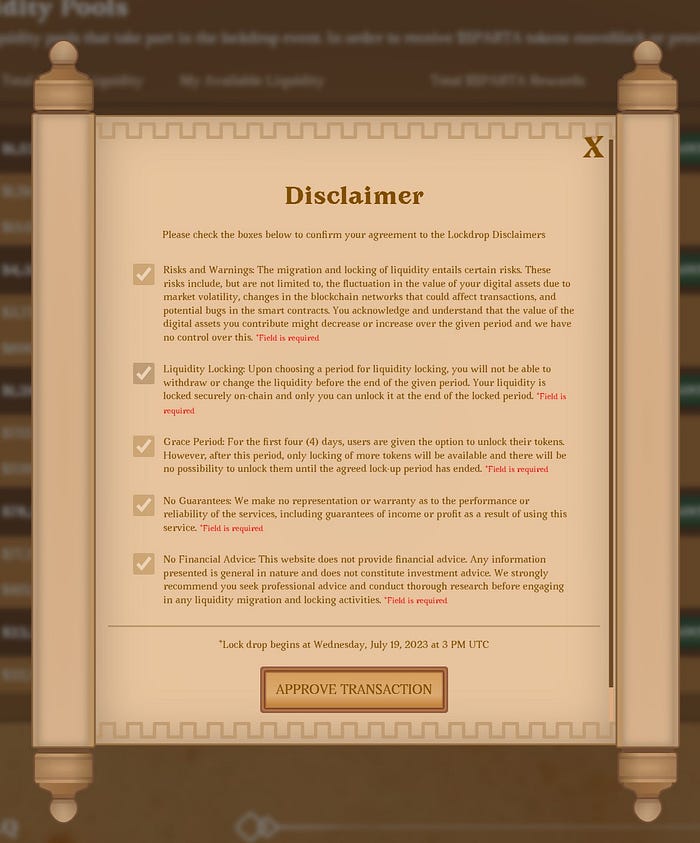
After ticking the consents and clicking “APPROVE TRANSACTION”, the transaction processing will begin. Your wallet (e.g. Metamask) will ask you to confirm it twice, the first action is required to approve spending of LP tokens, the second is to confirm the actual transaction.
If you have followed all the steps correctly, you will see this view:

And the “My locked liquidity” section will look like this:
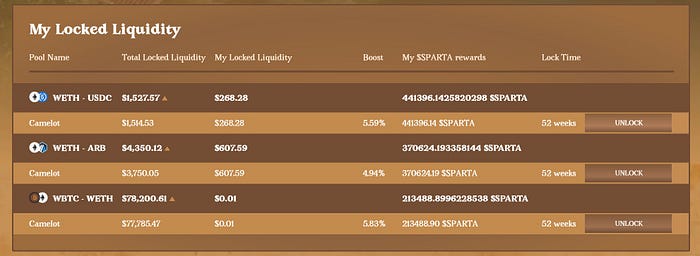
As you can see above, you can simultaneously lock liquidity for multiple currency pairs on different exchanges.
UNLOCKING LP TOKENS
You can also withdraw added liquidity till July 28, (3:59 PM UTC), after this date withdrawing liquidity will not be available to avoid speculative attacks of competitors who could provide a huge amount of liquidity reducing the potential number of prizes for other users and pay it out just before the end of the lockdrop.
Use the “UNLOCK” button to perform this action, but remember about losing chance to get some $SPARTA tokens. Apropriate line will remind you about this:
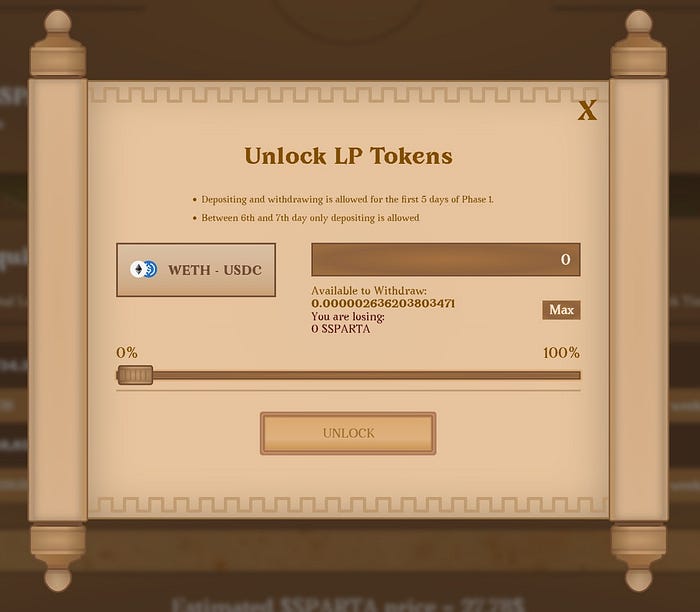
You can specify exactly how many LP tokens you want to withdraw from the lock using the slider, the “Max” button or by entering the exact number manually. Then click the “UNLOCK” button and confirm the transaction in your wallet.
Phase 1 ends on July 30, 3:59 PM UTC.
C. PHASE II — LOCKING SPARTA LIQUIDITY (JULY 30 –AUGUST 3)
The second phase of the lockdrop begins immediately after the end of the first one and consists in locking $SPARTA tokens received in the first phase and in the airdrop, as well as $USDC.e tokens.
Here’s what the interface for Phase 2 looks like:

What you see here is the:
- lockdrop timeline;
- Phase II summary and status (time remaining, total $SPARTA and $USDC.e added, your liquidity, rewards);
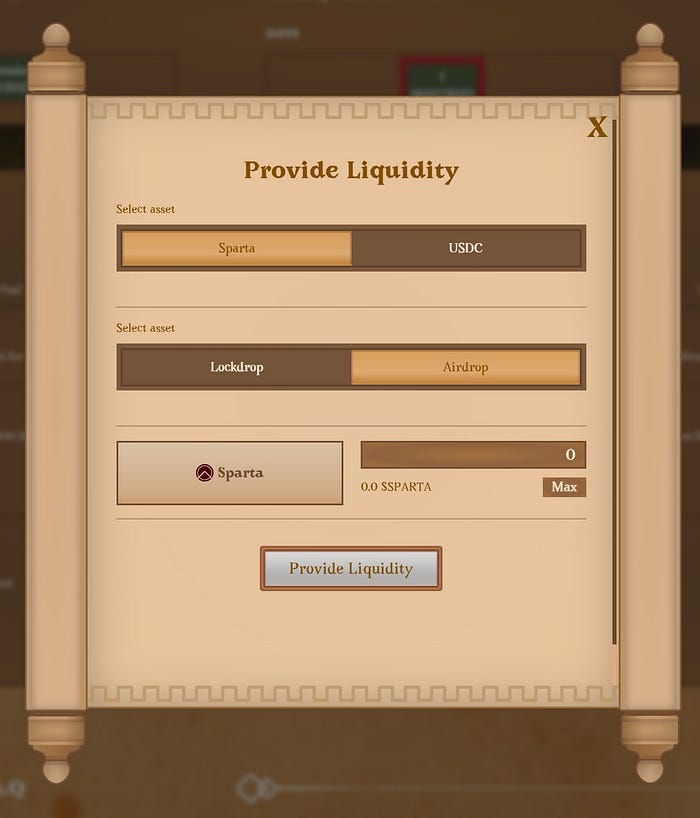
Participation in this phase is definitely simpler and it is only about locking $SPARTA tokens and/or $USDC.e tokens. After clicking the “Provide” button, you will see a window like the one below:

Here you can choose which token you want to lock ($SPARTA or $USDC.e), and from which pool your $SPARTA reward is going to be locked. By choosing “Lockdrop”, we have at our disposal the pools from which we received prizes in the first phase. Now all you have to do is enter the amount or click the “Max” button, then “Provide liquidity” and confirm the transaction in the wallet (e.g. Metamask).
Locking window for $SPARTA received from airdrop is even simpler. Here we have the option of setting only the quantity and confirming the transaction in the wallet.
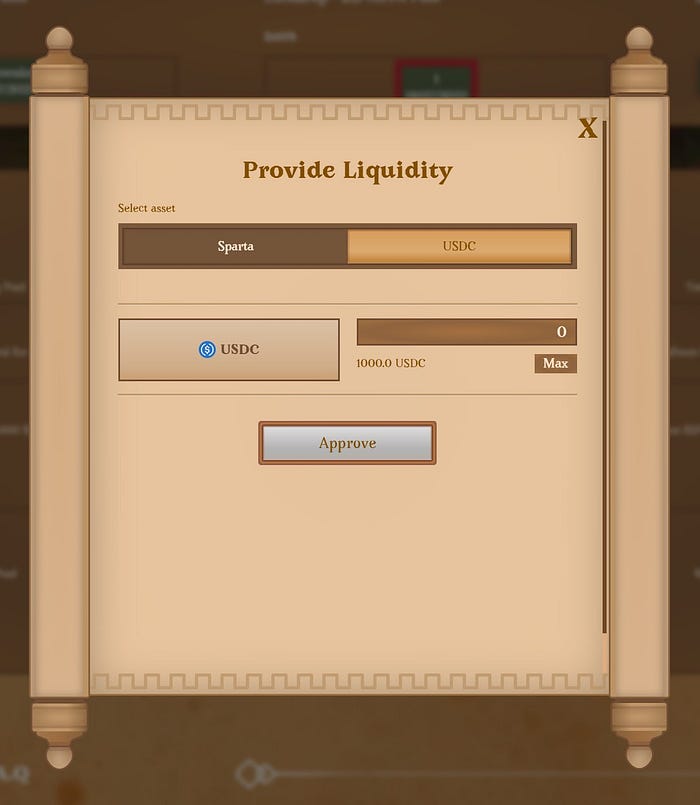
Providing liquidity for $USDC.e is also simple. Just enter the desired number of tokens, click “Approve” and confirm the transaction in the wallet.
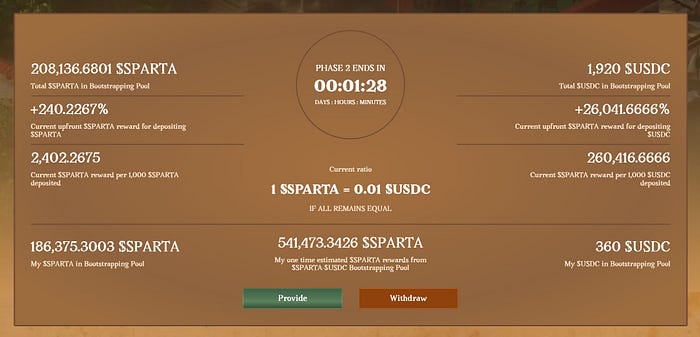
This is the Phase 2 main page after adding liquidity to $SPARTA and $USDC.e.
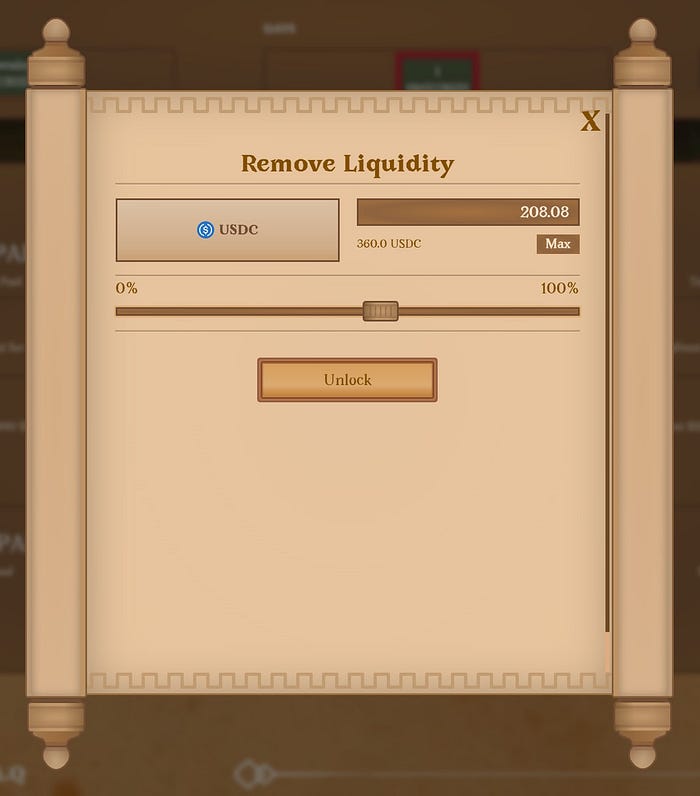
UNLOCKING $USDC.e TOKENS
IMPORTANT!
$SPARTA tokens locked in Phase 2 cannot be unlocked!
You can withdraw locked $USDC.e till August 1, (3:59 PM UTC), after this date withdrawing will not be available to avoid speculative attacks of competitors who could deposit a huge amount of $USDC.e reducing the potential number of prizes for other users and pay it out just before the end of the lockdrop.
Use the “Withdraw” button to unlock your $USDC.e.
— — — — —
That’s all you need to know about the Spartadex lockdrop process. To stay up to date with all the information, follow us and join the most courageous community on Arbitrum — the Spartans!
Twitter: https://twitter.com/Spartadex_io
Discord: https://discord.gg/spartadex
Website: https://spartadex.io/
Telegram: https://t.me/SpartaDEX